Setting a Static IP on a network interface
The first step in our journey involves assigning a static IP to a network interface (NIC) of a virtual machine. This ensures the IP address remains constant, which is crucial for DNS configurations and domain joining processes. Here’s how:
- Navigate to the virtual machine: Access the networking tab of your VM to find the linked network interface. (You can also search for ‘networking interface’ in the search bar at the top).
- Adjust IP configuration: Within the network interface settings, you’ll see ‘IP configuration’. Go here and change the IP assignment from dynamic to static, making sure the IP address remains unchanged. If you refresh the page, you’ll see it now shows as static.
Preparing for domain joining
Next, we’ll connect to the virtual machine so you can see the settings prior to any changes you’ll be making. We’ll do this via Bastion. The connection settings should already be in place, as you’ve set this up previously.
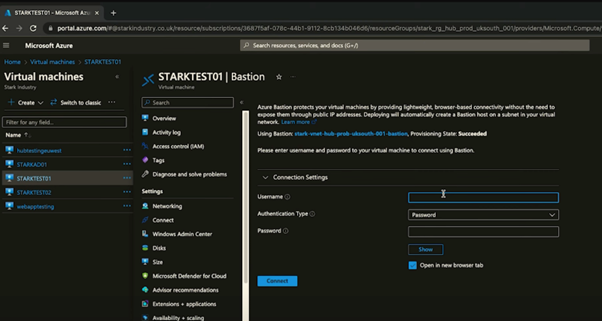
When the Bastion session has connected, you should be able to show an ipconfig. You’ll see that by default it has the Azure DNS servers.
Before domain joining your VM, you have to adjust the DNS settings to reflect your Active Directory (AD) server’s IP. This is ideally done at the virtual network level for uniform application across all VMs within that network.
- Access your virtual network: Locate the VNet hosting your VM.
- Customise DNS Settings: In the DNS servers section (option is on the left-hand menu), switch from default Azure-provided DNS to custom, inputting the IP address of your AD server.
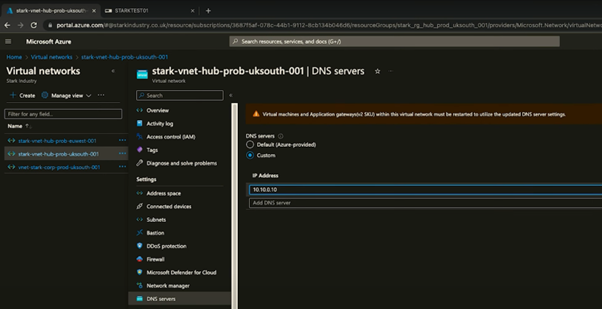
- Restart VMs: After applying DNS changes, perform a restart of the relevant VMs to make sure the updated DNS settings are saved.
Testing your DNS configuration and domain joining
With the DNS settings configured, test the setup by accessing the VM through Azure Bastion and verifying the DNS server assignment.
- Verify DNS settings: Use the ping command to check that the VM now uses your specified AD server as its DNS. Now that it has successfully domain joined, we should be able to ping it from the AD and that should resolve the correct IP. You should now see that it is resolved to the static IP that we set it to earlier.
- Domain joining: You can now go ahead and connect to the VM to make sure it’s working.
Integrating with Azure private DNS zones
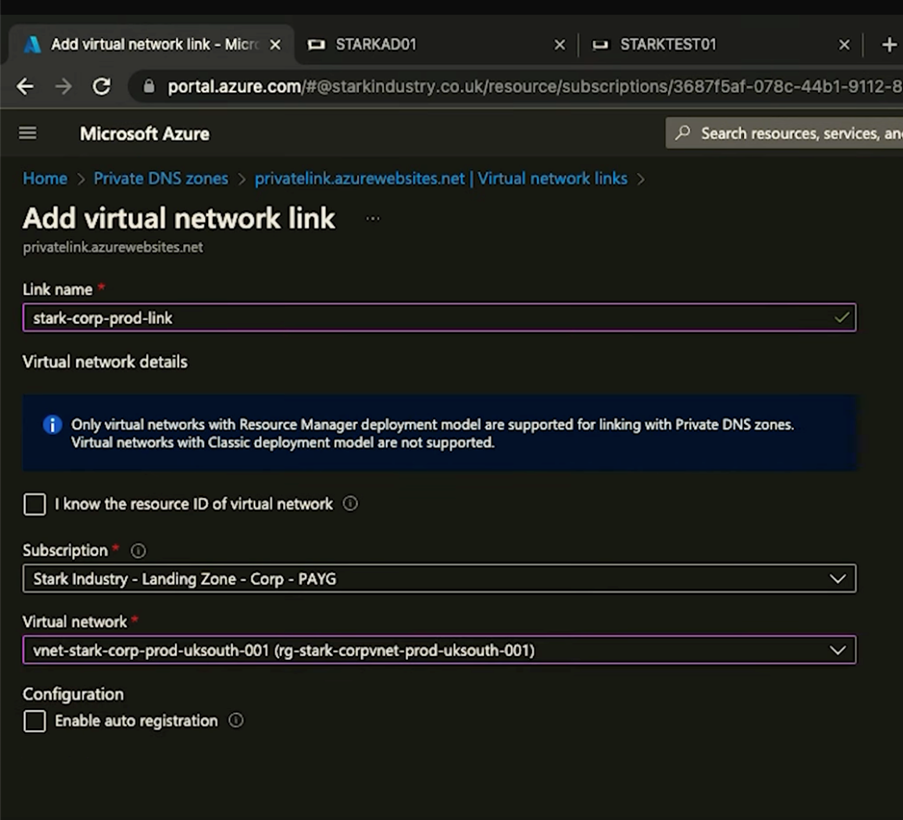
To allow your virtual networks to interact with Azure Private DNS Zones, you’ll need to create a virtual network link.
Within your Private DNS Zone settings, go to ‘Virtual network links’. Use this menu to add a link to your virtual network. Use your standard naming scheme for the link name, and select the VNet that you want. This will give this VNet access. Now if we look to configure DNS on the domain we should be able to get access to these zones.
Resolving DNS within Azure Private DNS Zones
The next thing that we’ll want to do is try and resolve some items in the private DNS Zone within Azure to follow best practice.
To make sure your domain’s resources can resolve DNS queries within Azure Private DNS Zones:
- In the Azure Portal, go to your Private DNS zones.
- Review DNS Records: Check for existing DNS records within the Private DNS Zone. These records should correspond to the services and resources you intend to resolve within your Azure environment. For demonstration purposes, let’s assume there are test records at 10.20.0.101 and 10.20.0.102.
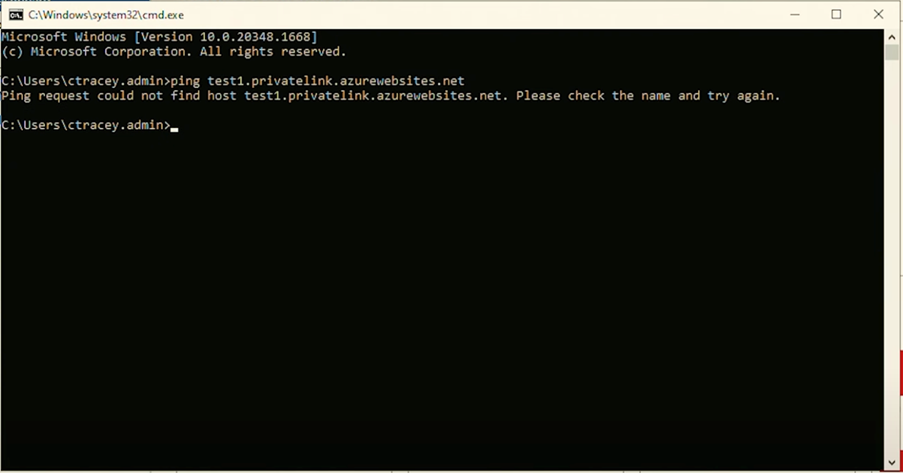
- Testing DNS Resolution: Before making any changes, attempt to resolve one of the test records from a VM within the domain to confirm the current state of DNS resolution. Use ping to query the test DNS records. Initially, you might find that the requests fail to resolve, indicating that the VMs are not yet correctly utilising the Azure Private DNS for resolution.
To fix this, we’ll configure your DNS forwarders as Azure DNS.
- Access DNS forwarders settings: On your domain controller or DNS server, locate the DNS forwarders settings. This is where you’ll direct DNS queries for Azure resources to the Azure DNS service.
- Edit DNS forwarders: Add the IP addresses of Azure DNS to the forwarders list. This step ensures that any DNS queries that cannot be resolved locally or within your private DNS zone are forwarded to Azure DNS for resolution.
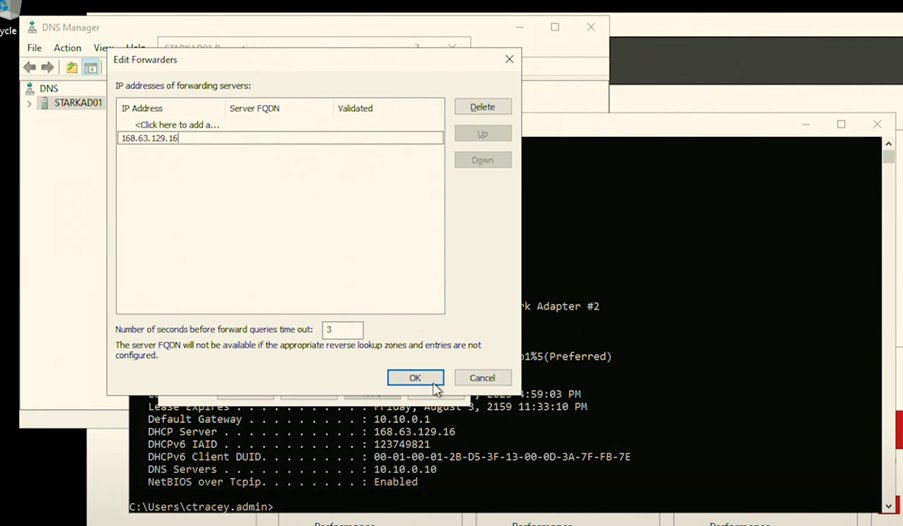
- Apply and save changes: Confirm the new settings and save.
- Repeat DNS resolution tests: Using the ping command, test the previously unresolved DNS records again. This time, you should see successful resolution, showing that queries are correctly being forwarded to Azure DNS and resolving against your Azure Private DNS Zone records.
- Verify across the domain: For thorough validation, perform DNS resolution tests from various points within your network to ensure consistent DNS resolution across your domain.
Recap and best practices
Today’s session covered essential steps in configuring DNS within Azure, from setting static IPs on VMs, adjusting DNS settings for domain joining, to integrating with Azure Private DNS Zones. These configurations make sure that your Azure environment is optimised for connectivity and security and is prepared for scalable deployments.
DNS configurations, while seemingly intricate, are important for the seamless operation of your Azure resources. Getting to grips with these settings lets you maintain control over your virtual network’s communication pathways, boosting your overall network efficiency and security.
For those preparing for the AZ-104 Microsoft Azure Administrator exam, today’s topics are really important, covering significant aspects of the “configure and manage virtual networking” section. As always, DNS can be a bit challenging, so feel free to revisit this guide or drop questions in the comments below.
Stay tuned for more insights in our Azure Masterclass series.
If you’re looking for more guidance on Azure management, Synextra’s team of experts know it like the backs of their hands. You can get expert help in just a few clicks – contact us to find out more.

